
MacOS
January 10, 2018
How to resize disk partition in macOS
How to resize disk partition in macOS
If you’ve changed the size of a partition, you may be able to fix it without erasing the entire drive.

Apple made it easier to resize partitions—logical divisions of a disk drive into separate mountable volumes with different properties—several releases of macOS ago. A Macworld reader resized their main volume to 369GB to set up a Boot Camp partition, but then realized it was too small. They wondered how to fix this.
In the right circumstance, you can simply follow these steps without having to back up the entire drive, erase and reformat it, and add new partitions.
Always back up your drive before attempting to resize partitions in case something goes wrong, or you accidentally click to proceed on a destructive operation.
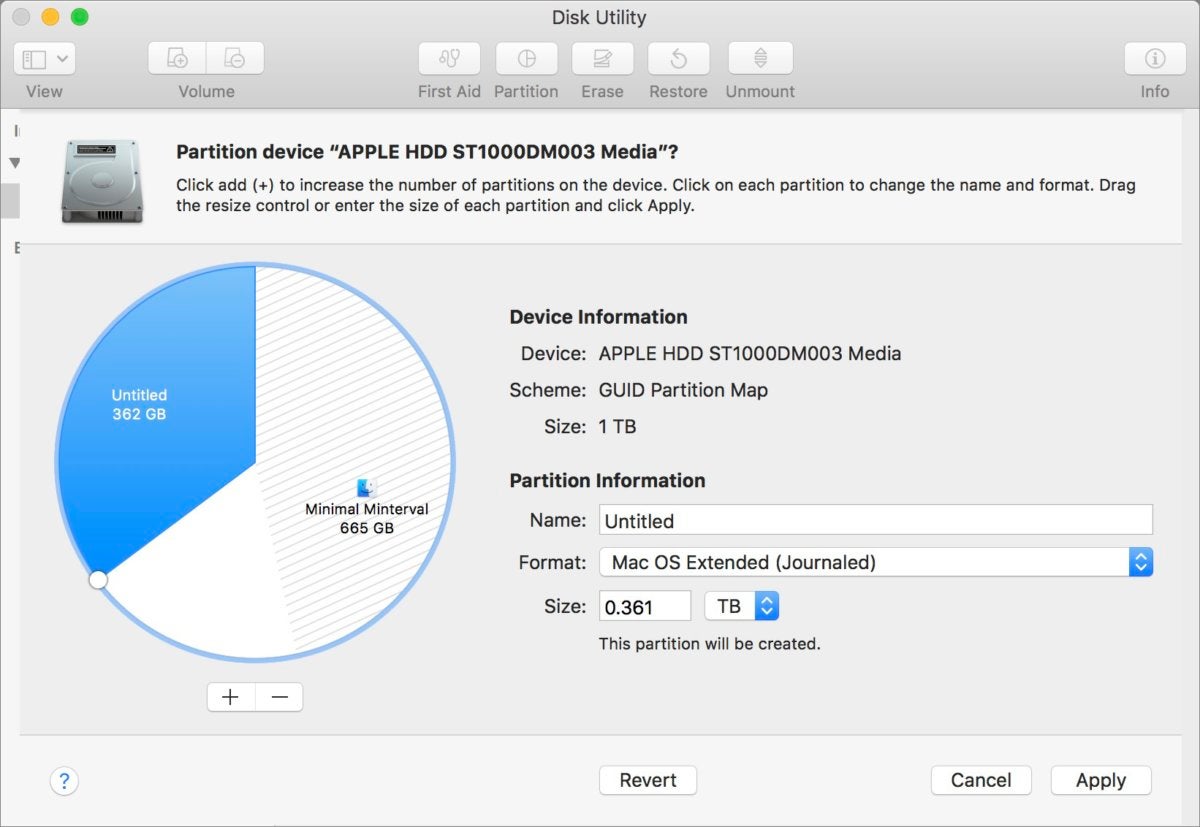
- Launch Disk Utility.
- Select the disk, not the volume, in the left-hand lists of disks.
- Click the Partitions button.
- You can now delete other partitions (select and click the - button), and type in the new size of your main partition in its Size field.
- Warning! Click Apply to proceed, and Disk Utility will warn you whether it will be a destructive operation, deleting the partition’s data and re-creating, or not. If it’s non-destructive, proceed.
I haven’t found a complete consistency in which drives have non-destructive resizable partitions or not. You can read a lot of detail about macOS drive partitioning, and still find that a volume that meets all the parameters for resizing without erasing, and still be told by Disk Utility that the partition will be erased.
If you need to erase to repartition, make a full clone, boot from macOS Recovery, and use Disk Utility in that mode to repartition, which will keep macOS Recovery intact if it’s a startup volume. You can then also restore your partition from a clone using Disk Utility as well.
courtesy:macworld.com
Also read:Today in Apple history: Steve Jobs introduces the MacBook Pro
Also read:The best iPad deals of January 2018
Also read:The best iMac deals of January 2018
Also read:Today in Apple history: Steve Jobs introduces the MacBook Pro
Also read:The best iPad deals of January 2018
Also read:The best iMac deals of January 2018


